Model Design
A variable (row) in a spreadsheet is an object in D-cide©. Using algebraic relationships, D-cide© allows the user to create different roles for an object or element in the Model.
CONSTANT |
VARIABLE |
SELF-REFERENCE |
SERIES |
INFLUENCE |
|
|
|
|
|
Constant: Objects having a single value which remains unchanged through the model.
|
Variable: Objects whose values are defined by formulas such as Revenue and Profit.
|
Self-Reference: Objects whose values are defined by self-reference formulas.
|
Series: Objects having a set of values, each referring to one column of the model.
|
Influence: Makes connection between objects in the model.
|
To add an object to the page, click on the desired object. A new window will open to fill out the information needed for that object as it relates to the problem to be solved. The following describes how to set each object appropriately. Each object has an optional “Description” field that can be used to further explain the object being defined.
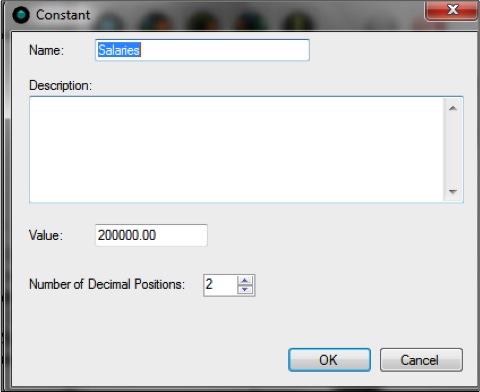
 Creating Constants Creating Constants
Click on the constant button on the toolbar to create a constant and open its properties:
-
Give the Constant object an appropriate name.
-
Click into the Value field and input the pre-specified value.
-
Select the amount of decimal places to be displayed.
-
Click OK when finished.
|
This object will be displayed:

|
 Creating Variables Creating Variables
Click on the variable button on the toolbar to create a variable and open its properties:
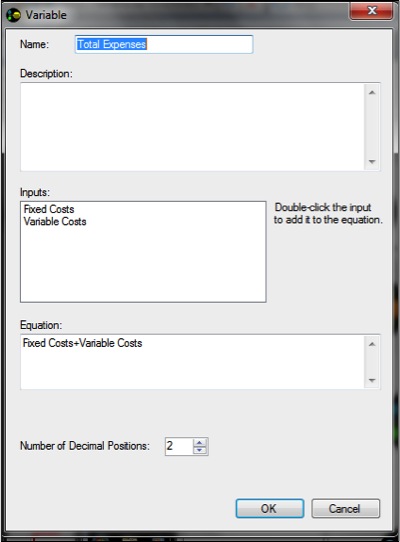
Variable
-
Give the Variable object an appropriate name and Click OK.
-
In order to continue with defining the Variable object, the influencing object is used to connect the Variable object to other objects in the model.

-
Click the Influencing object and move the mouse to the starting Variable. Click once and then go to the ending object and click once more to make the connection.
-
Double-click the Variable object to once again open its Properties window.
The rest of the Variable properties can now be populated. The "Inputs" field will populate according to how the Variable is influenced by the objects connected to the Variable.
The Variable object's equation can now be defined.
-
To add the Inputs to the equation, double-click on the respective input.
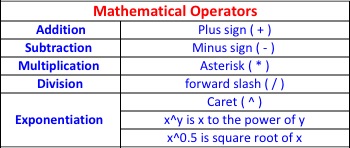
Write the equation using the appropriate operations defined. Keep in mind the order of operations:
|
 Creating Self-reference Variables Creating Self-reference Variables
Click on the self-reference variable button on the toolbar to create a self-reference variable and open its properties:
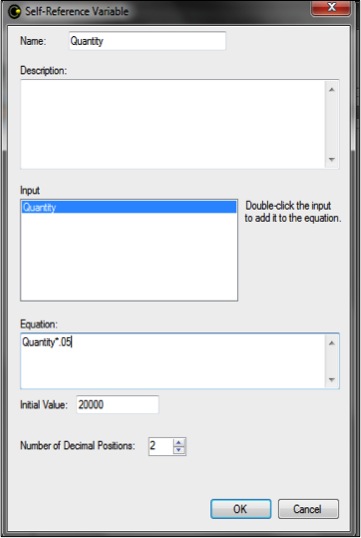
Self-Reference Variable
-
Give the Self-Reference object an appropriate name and Click OK. The input will automatically populate with the name given to the object.
-
Double-click the input to add it to the equation box then complete the remainder of the equation to achieve the desired outcome.
-
Add the Initial Value in the designated box. This value will be the starting value in the equation, and the first column of the model.
The number of Decimal Places can also be altered.
-
Click "OK" to return to the model.
|
 Creating Series Creating Series
Click on the series button on the toolbar to create a series and open its properties:
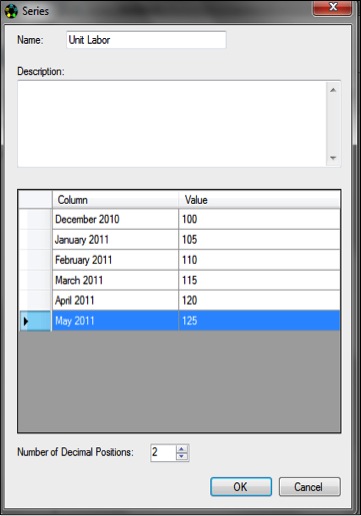
Series
- Give the Series object an appropriate name.
The columns that have been set will populate.
-
Double Click in the desired Value cell and set the Value to be used for that particular column.
-
Proceed by Double-Clicking into each Value cell and set the correct values for each column.
Once each column has the desired values set, choose the number of decimal positions.
-
Click "OK" to return to the model.
|
Creating Influences
Click on the influence button on the toolbar to connect the objects in the model:
Influence
-
Click on the influence button on the toolbar to enable the "Influence Mode". The mouse pointer changes to a "+" shape to make the connections.
-
Click on the object that you want the arrow to start.
-
Click on the object the arrow shall end.
You can create as many connections while in the influence mode. You will not have to keep clicking the influence button to continue to connect objects.
Note: Once you complete drawing the influences (arrows) you MUST click on the influence button again to disable the "Influence Mode" and continue with other functions.
-
Deleting an Influence is as easy as creating one. You will click on the arrow you wish to delete. Once it is highlighted, press the DELETE button on your keypad.
Note: It is important to remember that the changes and influences made throughout the model building process will not automatically reflect results immediately after being connected or altered. To show the new calculations made from the influence connections, the user will need to "Click" on the View drop-down on the top toolbar, and select the 'Refresh' option.
Calculations can also be refreshed by toggling to the Solution View Tab, and then back to the Design View. The changes made can also be shown if the columnar page is changed to the next column. Either way, one of these actions needs to take place before the changes the user makes to the model can be reflected and seen.
|
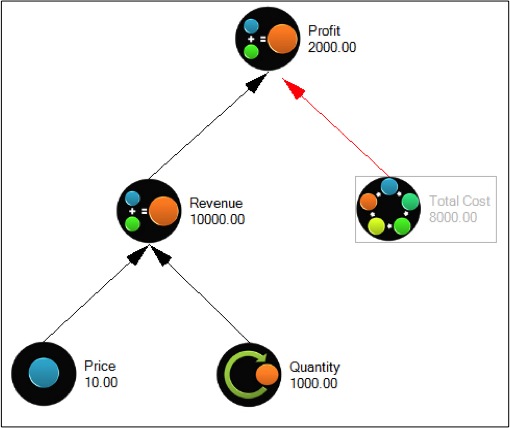
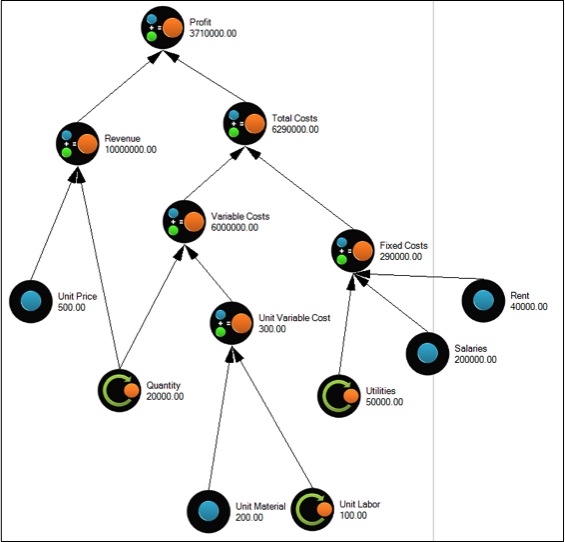
Once all of the variables are created and the appropriate 'influences' are made using the Influence Object, a completed model will look as follows:
Other Useful toolbar objects

Zoom in |

Zoom out
|

Model Properties |
Model Properties
Click on the model properties button on the toolbar to open the model properties:
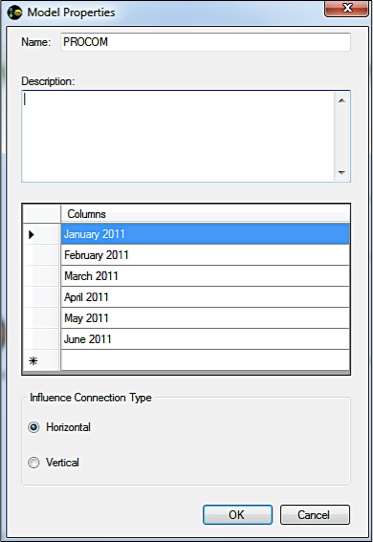
Once the Model Properties dialog box is open, one can make changes in the model such as adding new columns to the model or reducing the number of columns in the model. For example, a model could be from January to December and the user might decide to change it from January to June. The user can delete 6 months here by clicking on the appropriate column rows.
|